Problem: You’re running a food or beverage canning line and rely on a non-magnetic empty can cleaner/disinfector to ensure cans are spotless and sanitized before filling. What happens if this critical machine breaks down or fails to clean properly? Production could grind to a halt, cans might be contaminated, and you could face costly downtime or even product recalls.
Agitation: The stress of an unexpected breakdown is real – every minute of downtime means lost output and revenue. Plus, in food processing, any hygiene slip-up can jeopardize safety and compliance.
Solution: The good news is that proper maintenance can prevent most problems. By following a regular maintenance routine, you can keep your can cleaning machine running smoothly, avoid breakdowns, and ensure consistent cleanliness and disinfection.
In this blog, I’ll guide you through how to maintain and service a non-magnetic empty can cleaning and disinfecting machine effectively, so you can keep your production on track and your products safe.
How to maintain a magnetic-free empty can cleaning and disinfecting machine: To keep your machine in top condition, perform daily cleaning of residues and sanitizing of food-contact parts, conduct weekly inspections of components like spray nozzles and conveyor belts, lubricate moving parts as recommended, and follow manufacturer guidelines for preventive maintenance. Address any issues promptly and keep detailed logs of all maintenance activities. This proactive approach will maximize uptime, ensure cans are properly cleaned and disinfected, and extend the machine’s lifespan.

Daily Maintenance Routine
At the end of each production day, your empty can cleaner is covered in dirt, debris, and possibly product residues. If left uncleaned, these residues can dry on and cause blockages or bacterial growth, leading to poor cleaning performance or even contamination.
Imagine starting the next day’s production only to find the machine isn’t rinsing cans effectively – you might have to scrap batches or risk dirty cans going into fill.
A thorough daily cleaning and inspection will set the machine up for success the next day. Here’s what to do every day:
Clean and Sanitize Surfaces: After shutting down, wipe down all surfaces of the machine, especially the parts that contact the cans. Remove any food debris, dust, or residues from the conveyor belts and interior of the cleaning chamber. Use appropriate cleaners and sanitizers for food-grade equipment. This ensures a clean environment for the next batch and prevents cross-contamination.
Check Spray Nozzles and Jets: Inspect all spray nozzles that rinse or disinfect the cans. Make sure they are not clogged and are spraying evenly. If you use a steam or chemical disinfection system, verify that the spray patterns cover the entire can interior and exterior. Clear any blockages (e.g. from dried particles) and replace any damaged nozzles.
Inspect Conveyor and Mechanisms: Look over the conveyor belts or rollers that move the cans through the machine. Ensure they are properly aligned and running smoothly. Check for any signs of wear, cracks, or slipping in belts. Also, listen for any unusual noises or vibrations during operation – these can be early warning signs of issues. If you hear grinding or rattling, investigate and fix the cause immediately.
Empty and Clean Reservoirs (if applicable): If your machine has water or sanitizer tanks or sumps, drain and clean them daily. Remove any collected debris or sediment. This prevents buildup that could clog pumps or contaminate the cleaning solution. Refill with fresh water and sanitizer as needed for the next production run.
Final Wipe-Down: Before leaving for the day, give the machine a final wipe to remove any remaining moisture or cleaner. Leaving water sitting can cause rust or scale, especially if the machine has stainless steel parts. Keeping it dry (or using a corrosion inhibitor in water) will protect the equipment.
By doing these daily tasks, you ensure that the machine is always ready for the next day’s use. A clean machine not only performs better but also reduces the risk of microbial contamination in your process.
Weekly Maintenance Checklist
Over the course of a week, even with daily cleaning, some wear and minor issues can creep into the machine. Small problems like a loose bolt or a worn seal might not stop the machine immediately, but if ignored, they can grow into bigger failures.
You don’t want a small leak or misalignment to turn into a major breakdown by the end of the week–that could ruin your weekend and halt production. A weekly maintenance routine catches these issues early. Here’s a checklist of tasks to perform once a week:
Deep Cleaning of Components: Take the time to do a more thorough cleaning than the daily wipe-down. If the machine has removable parts (like spray bars, drip trays, or filters), take them out and clean them. Scrub off any stubborn residues or mineral deposits. For example, if you use hot water or steam, you might find limescale buildup–use an appropriate descaler to remove it. This deep clean ensures all nooks and crannies are free from dirt and biofilm.
Lubrication of Moving Parts: Check all moving mechanical parts that require lubrication. This might include conveyor chain links, bearings on rollers or motors, and any gearboxes. Use the lubricant type recommended by the manufacturer (often food-grade lubricants are needed in food environments) and apply it as per the schedule. Note: Don’t over-lubricate, as excess grease can attract dirt. But also don’t skip lubrication–it prevents friction and wear, keeping parts moving smoothly.
Inspect Belts, Chains, and Pulleys: Examine the conveyor belts for signs of wear, fraying, or stretching. Check that belt tension is correct–too loose and it may slip, too tight and it can strain motors. For chain-driven parts, inspect the chain for elongation or worn links and ensure proper tension. Look at pulleys and sprockets for any damage or misalignment. Misaligned or worn belts/chains can cause uneven movement of cans or even jams. Adjust or replace parts as needed.
Check Electrical Connections: Inspect the electrical components of the machine (sensors, control panels, motors), do a visual inspection of connections. Ensure that all wiring and connectors are secure and free from damage. Look for any signs of overheating (like discoloration or burning smell) on electrical parts. Loose wires or failing components can cause intermittent operation or safety hazards, so tightening or replacing them proactively is wise.
Test Safety Devices: Verify that all safety interlocks and emergency stop devices are functioning. For instance, if the machine has a door or cover that must be closed for operation, make sure the safety switch works–the machine should not run when the door is open. Press the emergency stop button to confirm it halts all motion immediately. Ensuring these safety features work protects your operators and equipment.
Review Performance: Take a few minutes to review how the machine performed during the week. Did it clean all cans effectively? Any cans coming out with spots or still dirty? If you noticed any decline in cleaning quality, use the weekly maintenance time to troubleshoot. It could be a nozzle issue, a pressure problem, or something else that needs adjustment. Also, check if the machine’s cycle times or sensor readings have stayed consistent. Catching performance anomalies early can prevent bigger problems later.
By following this weekly checklist, you’ll address issues that daily cleaning alone might miss. This proactive maintenance helps prevent unexpected failures and ensures the machine remains in optimal condition throughout its use.

Monthly Maintenance Tasks
As the machine runs day after day, some components naturally wear out or drift out of calibration. Monthly maintenance is like a health check-up–it catches issues that develop over longer periods and might not be obvious week to week.
Without monthly checks, you might suddenly find that your machine’s cleaning efficiency has dropped or a part fails without warning. For example, a pump might lose pressure gradually, or a sensor might become less accurate. Performing key maintenance tasks monthly ensures that the machine stays calibrated and all parts are in good condition for the long haul. Here are important monthly tasks:
Calibration and Alignment: Check the alignment of all moving parts and the calibration of any sensors or controls. Ensure the conveyor tracks are aligned so cans move straight through without rubbing or jamming. If the machine has adjustable guides or spacing mechanisms for different can sizes, verify they are correctly positioned. Calibrate any pressure gauges, temperature sensors, or timing controls according to the manufacturer’s specs. Proper calibration guarantees that the machine operates at the intended performance (e.g. the right water pressure for cleaning, the correct exposure time for disinfection).
Inspection of Wearable Parts: Identify parts that are known to wear and inspect them monthly. This could include conveyor belt drive rollers, seals around moving shafts, or the gaskets on any access doors. Look for signs of wear such as cracks, thinning, or deformation. For instance, rubber seals can degrade over time due to cleaning chemicals or heat; if a seal is worn, it might start leaking sanitizer or letting in contaminants. Similarly, check any filters in the system (like water filters or air filters for pneumatic parts) and clean or replace them if they are clogged. Worn or clogged parts should be replaced before they cause a failure.
Functional Testing of Systems: Test each major function of the machine to ensure it’s working as intended. If it’s a spray washer, run a test cycle without product and observe that all spray zones activate and cover the area. If it’s a steam sterilizer, verify that the steam reaches the necessary temperature and pressure within the specified time. Check that any automated features (like can infeed sensors, or a system that stops the machine if a can is jammed) are responsive. Essentially, simulate normal operation and make sure every subsystem performs correctly. This helps catch issues like a failing pump, a malfunctioning valve, or a sensor that’s not triggering properly.
Electrical and Control System Check: Do a more detailed check of the electrical and control components monthly. Dust and dirt can accumulate inside control panels over time, so carefully clean any dust from electrical enclosures (use compressed air or a soft brush, being mindful of static). Check that cooling fans (if present) are running and not clogged. Ensure all control settings (on control panels or PLCs) are at the correct values – sometimes settings can get accidentally changed or drift. If your machine has a digital interface or touchscreen, test that all buttons and indicators work and that error messages (if any) are resolved.
Documentation and Log Review: Use this time to review the maintenance logs from the past month. Have there been any recurring minor issues? For example, if one particular nozzle keeps clogging, note that and consider if there’s a root cause (maybe a filter upstream needs changing more often). Document all the maintenance you perform this month in the log–what was checked, what parts were replaced or adjusted. Good record-keeping helps track the machine’s health over time and is invaluable for warranty or when the manufacturer’s service team needs to know the history.
By conducting these monthly tasks, you’re ensuring that the machine remains reliable and efficient. Many manufacturers actually recommend monthly or quarterly maintenance in their manuals to keep the equipment in peak condition. This foresight can save you from major headaches down the line.
Preventive Maintenance Schedule
Reactive maintenance–fixing things only after they break–is expensive and stressful. In a food processing setting, it can also mean product waste and missed deadlines. Think about the worst-case scenario: a critical part like a pump or motor fails unexpectedly during a big production run. You’d have to stop everything, order a replacement (which might take days), and scramble to get back on track. The downtime could cost thousands in lost production and rush shipping fees.
Preventive Maintenance Schedule. Instead of waiting for failures, you plan maintenance tasks at regular intervals to replace parts or service components before they fail. This approach maximizes uptime and avoids costly emergency repairs.
Here’s how to set up a preventive maintenance schedule for your non-magnetic can cleaner:
Follow Manufacturer Guidelines: Start with the maintenance schedule provided by the machine’s manufacturer. They know the equipment best and usually specify recommended intervals for tasks like lubrication, part inspections, and component replacements. For example, they might say “replace the water pump filter every 3 months” or “inspect the drive motor bearings every 6 months.” Adhering to these guidelines is key–manufacturers often base them on testing and field experience. In fact, proper maintenance as per the manual is often required to keep your warranty valid.
Create a Calendar of Tasks: Break down maintenance tasks by frequency–daily, weekly, monthly, quarterly, annually–as we’ve discussed, and put them on a calendar or schedule. Assign responsibility to maintenance staff or operators (with proper training) to ensure tasks get done on time. For instance, you might schedule a quarterly deep maintenance where the machine is taken apart for thorough cleaning and any parts showing wear are preemptively replaced. A yearly maintenance might involve having a certified technician perform a comprehensive inspection or service. Having a written schedule and checklist helps ensure nothing falls through the cracks.
Use a Maintenance Log/Software: Keep a log (digital or paper) of all maintenance performed. This log should note the date, what was done, which parts were replaced or serviced, and any observations. Over time, this log can reveal patterns–for example, if you see that a certain bearing needs replacement every 12 months, you can proactively order a new one and plan to swap it out annually before it fails. Some companies use maintenance management software or CMMS (Computerized Maintenance Management Systems) to track schedules and log tasks, which can be very helpful for larger operations.
Preemptive Part Replacement: Identify critical components that have a finite lifespan and replace them before they fail. For example, belts, hoses, and gaskets might need replacement once a year (or even more frequently if under heavy use) as they wear out. Motors or pumps might have recommended service intervals (like lubricating motor bearings yearly or rebuilding a pump every few years). By replacing or servicing these parts on schedule, you prevent unexpected breakdowns. Yes, it requires some investment and planning, but it’s far cheaper than an emergency repair or production stoppage.
Monitor Performance for Adjustments: A good preventive maintenance schedule isn’t static–you should adjust it based on your machine’s actual performance and workload. If your machine runs 24/7, it will likely need more frequent maintenance than one that runs 8 hours a day. If you notice that after a certain number of hours of operation a part tends to fail, you can adjust the schedule to service it a bit earlier. Conversely, if a part consistently lasts longer than the recommended interval, you might extend the interval slightly (though it’s generally safer to err on the side of caution). The goal is to find the optimal balance where you’re neither over-maintaining (wasting resources on parts that are fine) nor under-maintaining (risking failures).
By implementing preventive maintenance, you’ll see tangible benefits: fewer breakdowns, longer machine life, and smoother operations. Studies in food processing have shown that routine maintenance (cleaning, lubrication, part replacement) prevents excessive wear and tear and can significantly extend equipment life. In fact, a well-maintained machine can often run efficiently for years longer than one that is neglected, delaying the need for expensive new equipment purchases. Moreover, you’ll reduce unplanned downtime, which means your production schedule stays on track and you avoid the costs of rush orders or missed deliveries. In short, a little prevention goes a long way in keeping your can cleaning machine–and your business–running smoothly.
So, take that first step today: create or review your maintenance schedule for the can cleaner. Ensure your team is trained and equipped to do the tasks. By investing a little time and effort in maintenance now, you’ll save yourself a lot of headaches later. Your machine will thank you with years of dependable service, and you’ll have peace of mind knowing that every can going into your filling line is properly cleaned and disinfected. Here’s to smooth operations and spotless cans!
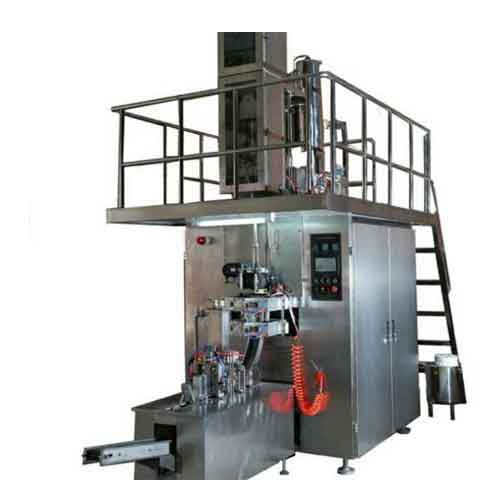
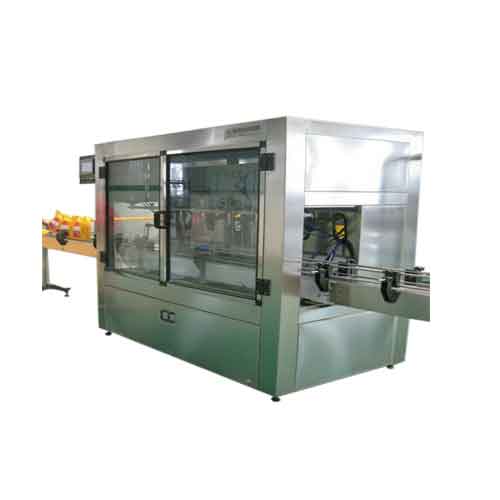
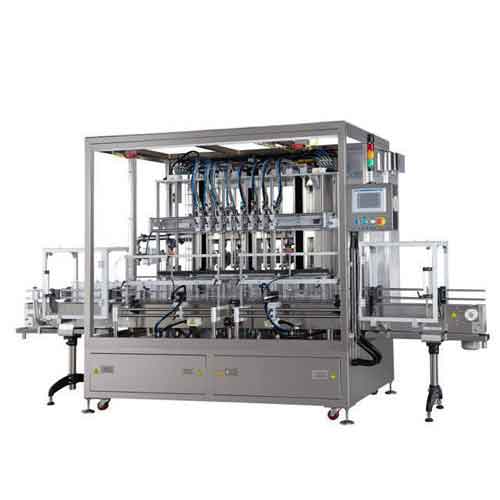
Union Machinery has been engaged in food machinery customization services since its establishment in 2014, according to customer needs for you to tailor suitable machinery and equipment, for more product information, please refer to: Magnetic Free Empty Can Cleaning And Disinfection Machine、Milk Powder Filling Production Line; Our expertise and advantages will bring you more opportunities and development space.
For personalized, industry-tailored advice and to explore state-of-the-art solutions, please don't hesitate to contact us at info@unmachinery.com
The following is other knowledge related to magnetic-free can cleaning and disinfection machine that I have summarized based on long-term work experience, for your reference. I hope it will be helpful to you.
1.What Are the Working Principles and Functions of a Magnetic-Free Empty Can Cleaning and Disinfection Machine?
2.What are the common faults of the magnetic-free empty can cleaning and disinfection machine?
Product List
HOT PRODUCT